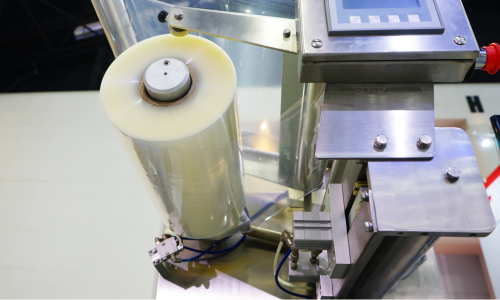
As a professional painter, mastering the use of a masking machine is key to achieving maximum performance and efficiency in your work.
A masking machine, also known as a tape dispenser, is a valuable tool that helps streamline the process of masking off areas before painting, saving time and ensuring clean lines.
Here's a guide on how to use a masking machine effectively for optimal results.
-
Select the Right Tape: Before loading the masking machine, ensure you have the appropriate tape for the job.
For general painting projects, painter's tape with medium adhesion is recommended. For delicate surfaces or when using aggressive paints, choose low-adhesion painter's tape to prevent damage upon removal.
-
Prepare the Machine: Start by loading the masking machine with the selected painter's tape.
Open the tape compartment and insert the roll, ensuring it is aligned properly and securely in place.
Close the compartment and pull out a sufficient length of tape to begin masking.
-
Adjust Tension and Cutting Mechanism: Most masking machines come with adjustable tension settings to control the tape's tightness during application.
Set the tension according to your preference, keeping it tight enough to adhere well but not too tight to cause stretching or tearing.
Familiarise yourself with the cutting mechanism of the machine, whether it's a blade or serrated edge, to cleanly cut the tape when needed.
-
Masking Technique: Position the masking machine at the starting point of the area you want to mask, ensuring the tape adheres firmly to the surface.
Use steady, even pressure to guide the machine along the edge or surface, applying the tape smoothly without wrinkles or bubbles. For corners or curves, adjust the machine's angle to maintain a consistent application.
-
Overlap and Seal Edges: When masking large areas, overlap the tape slightly to ensure complete coverage and prevent paint bleed-through.
Use a plastic smoothing tool or your fingers to press down the edges firmly, creating a tight seal and preventing paint from seeping underneath.
-
Trim and Remove Excess Tape: Once the masking is complete, use the built-in cutting mechanism of the masking machine or a separate utility knife to trim any excess tape neatly.
Take care not to cut into the surface or paint underneath.
-
Inspect and Touch Up: Before painting, inspect the masked areas for any gaps or loose edges.
Press down any lifted corners and reapply tape if necessary to ensure a secure seal.
Once satisfied, proceed with your painting project, confident that the masking machine has helped achieve precise lines and protected adjacent surfaces.
By following these steps and practicing proper masking techniques, you can harness the full potential of a masking machine for maximum performance in your painting projects.
Mastering this essential tool will not only save time and effort but also elevate the quality of your work with clean and professional results.

